


How to Prevent Pipe Bursts in Summer
Have you ever worried about pipe bursts during summer?
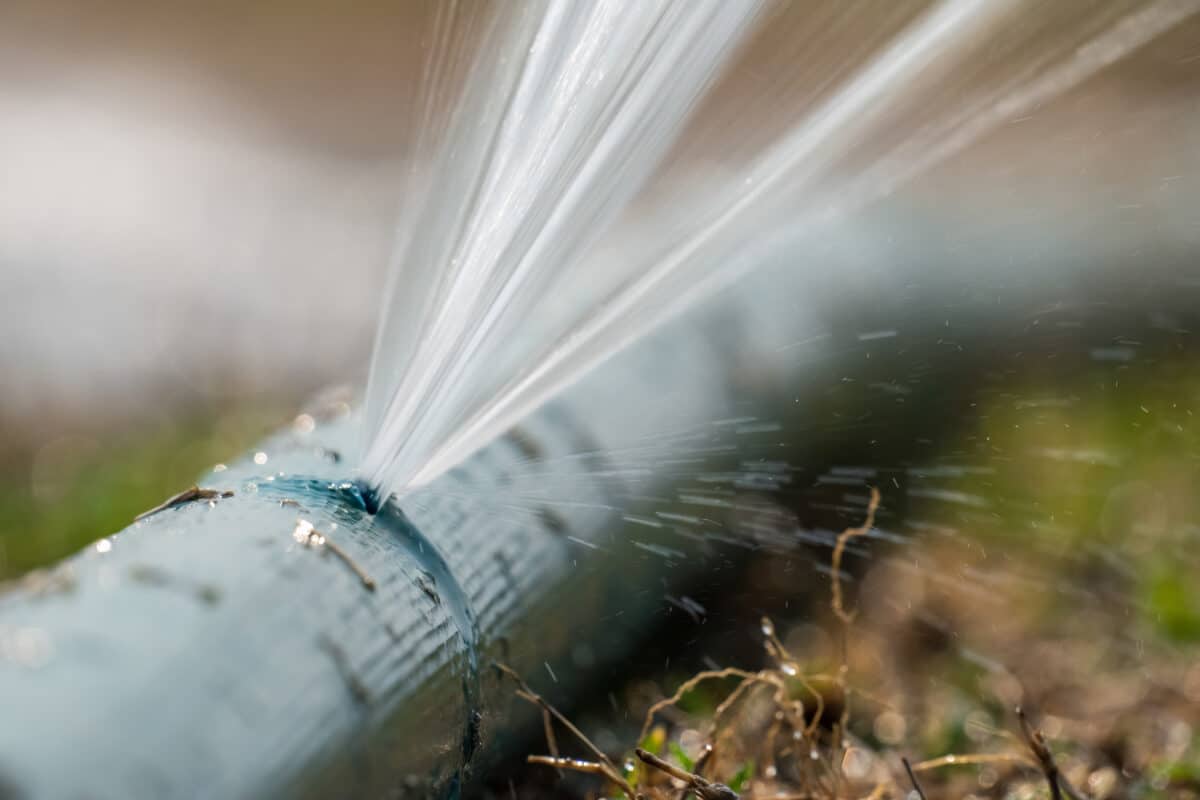
Preventing pipe bursts in summer is crucial for maintaining a problem-free home.
During the hot months, your plumbing system faces unique challenges. High water pressure, aging pipes, and physical damage can lead to unexpected issues. By understanding these factors and taking proactive measures, you can safeguard your home from costly repairs and water damage.
In this guide, we’ll explore the causes of pipe bursts in summer, how to identify vulnerable pipes, and practical tips for preventing these problems. Whether you’re a seasoned homeowner or new to home maintenance, these insights will help you keep your plumbing system in top shape.
Understanding Pipe Bursts
Understanding why pipe bursts happen is the first step to preventing them.
Importance of Prevention in Summer
Why focus on summer? The warmer months bring unique challenges. Increased water usage, ground shifts from heat, and outdoor activities can all stress your pipes. Preventing issues before they start saves money and hassle. Proper maintenance ca keep your pipes intact through the hottest months.

Photo from iStock – Credit: schankz
Causes of Pipe Bursts in Summer
Pipe bursts in summer can stem from various issues. Knowing these causes helps you take the right steps to prevent them.
High Water Pressure
High water pressure is a leading cause of pipe bursts. Excess pressure stresses the pipes, causing them to weaken and eventually break. Regularly checking and maintaining optimal pressure levels is essential for preventing bursts.
Corrosion and Aging Pipes
Over time, pipes can corrode and weaken. Older homes are especially at risk. Corroded pipes are more likely to burst under pressure or due to temperature changes. Regular inspection and replacement of old pipes can mitigate this risk.
Physical Damage
Physical damage from external sources, such as construction work or landscaping, can lead to pipe bursts. Even minor damage can weaken pipes, making them more susceptible to bursting when stressed.
Identifying Vulnerable Pipes
Identifying pipes at risk is key to preventing pipe bursts. Knowing where to look and what signs to watch for helps you act before problems escalate.
Common Locations of At-Risk Pipes
Certain areas in your home are more prone to pipe issues. Pipes located in basements, crawl spaces, attics, and exterior walls are especially vulnerable. These areas often experience temperature fluctuations and are harder to monitor regularly.
Signs of Potential Issues
Look for warning signs that indicate potential pipe burst issues. Common signs include:
- Discolored Water: This can signal rust and corrosion inside your pipes.
- Low Water Pressure: A drop in water pressure can indicate leaks or blockages.
- Unusual Noises: Banging or gurgling sounds in pipes may point to air pockets or pressure issues.
- Damp Spots: Unexplained wet patches on walls, ceilings, or floors suggest hidden leaks.
- Increased Water Bills: A sudden rise in your water bill could mean there’s a leak somewhere in your system.
Inspecting Your Plumbing System
Regular inspections can catch small problems before they become big issues.
Regular Inspection Tips
- Visual Checks: Regularly examine exposed pipes for signs of wear, corrosion, or damage.
- Water Meter Test: Check your water meter before and after a few hours of no water use. A change indicates a leak.
- Professional Inspections: Schedule annual inspections by a licensed plumber to ensure your system is in good shape.
Tools Needed for Inspection
- Flashlight: To see in dark areas like basements and crawl spaces.
- Moisture Meter: To detect hidden dampness in walls and floors.
- Wrench: For tightening loose pipe connections.
- Pressure Gauge: To measure water pressure levels.
Regular inspections help you spot issues early, reducing the risk of pipe bursts and costly repairs.
Pressure Regulation Techniques
Maintaining proper water pressure is crucial to preventing pipe bursts. High pressure can strain pipes, leading to leaks and bursts.
Importance of Maintaining Proper Pressure
Why is water pressure important? Excessive pressure can stress pipes, causing them to wear out faster. On the other hand, low pressure can indicate leaks or blockages. Aim to keep your home’s water pressure between 40 and 60 psi (pounds per square inch) for optimal performance.
Installing Pressure Regulators
A pressure regulator ensures consistent water pressure throughout your home. Here’s how to install one:
- Turn Off the Water Supply: Before installing a regulator, turn off the main water supply to your home.
- Choose the Right Regulator: Select a regulator suited to your home’s needs. Consult with a professional if unsure.
- Locate the Main Water Line: Typically found near where the main water supply enters your home.
- Cut the Main Line: Use a pipe cutter to make a clean cut where you will install the regulator.
- Install the Regulator: Follow the manufacturer’s instructions to attach the regulator to the cut pipe.
- Check for Leaks: Once installed, turn the water back on and check for any leaks around the connections.
- Adjust the Pressure: Use a pressure gauge to ensure the regulator is set within the 40-60 psi range.
Regularly checking and adjusting the regulator ensures your home’s water pressure remains at safe levels.
Insulating Pipes Effectively
Insulating your pipes is a key step in preventing bursts, especially during temperature fluctuations in summer.
Materials for Insulation
Choosing the right materials is essential for effective pipe insulation. Here are some common options:
- Foam Pipe Insulation: Easy to install and provides good protection.
- Fiberglass Wrap: Ideal for high-temperature areas; requires careful handling.
- Rubber Insulation: Durable and flexible, suitable for both hot and cold pipes.
- Pipe Wrap Tape: Good for tight spaces and irregular pipe shapes.
DIY Insulation Steps
Follow these steps to insulate your pipes effectively:
- Measure the Pipes: Determine the length and diameter of the pipes you need to insulate.
- Cut the Insulation: Cut the insulation material to fit the length of your pipes.
- Wrap the Pipes: Securely wrap the insulation around each pipe, ensuring there are no gaps.
- Seal the Joints: Use insulation tape to seal any joints or seams.
- Secure the Insulation: For added security, use zip ties or clamps to hold the insulation in place.
- Inspect the Work: Check for any areas you may have missed and ensure the insulation is snug.
Maintaining Consistent Water Flow
Keeping water flowing smoothly through your pipes helps prevent pressure build-up and potential bursts.
Benefits of Keeping Faucets Dripping
During extreme weather, letting faucets drip can prevent pipes from freezing and bursting. This small flow of water relieves pressure in the system.
Techniques for Ensuring Flow
- Regular Use: Use all taps regularly to keep water moving.
- Flush Out Sediment: Periodically flush out your system to remove sediment build-up that can cause blockages.
- Check for Leaks: Regularly inspect your pipes for leaks and repair them promptly.
Consistent water flow and proper insulation are simple yet effective ways to protect your pipes from bursts during summer.
Avoiding Physical Damage
Physical damage to pipes can lead to unexpected pipe bursts. Preventing damage involves careful landscaping, awareness of construction activities, and proper pipe installation.
Safe Landscaping Practices
Landscaping can impact your plumbing system. Here are some tips to protect your pipes from pipe bursts:
- Plant Wisely: Avoid planting trees and shrubs near underground pipes. Their roots can grow into pipes, causing blockages and damage.
- Use Barriers: Install root barriers to prevent roots from reaching your pipes.
- Plan Pathways: When designing garden paths or driveways, plan them away from your main water lines.
- Mark Pipe Locations: Mark the locations of underground pipes before digging or planting.
Awareness of Construction Activities
Construction work around your home can pose risks to your pipes. Here’s how to stay vigilant:
- Know the Layout: Be aware of where your pipes are located before any construction begins.
- Communicate: Inform contractors of pipe locations to prevent accidental damage.
- Monitor Work: Keep an eye on construction activities to ensure they don’t interfere with your plumbing.
Proper Pipe Installation
Proper installation is crucial for preventing future pipe problems. Here are some guidelines:
Choosing the Right Materials
Select materials suited to your climate and usage needs:
- PVC: Durable and resistant to corrosion; good for cold water lines.
- Copper: Long-lasting and reliable, but can corrode over time.
- PEX: Flexible and easy to install; good for both hot and cold water.
Professional Installation Tips
Consider these tips when installing pipes:
- Hire a Professional: Professional installation ensures pipes are correctly placed and secured.
- Follow Codes: Adhere to local building codes and regulations.
- Secure Connections: Ensure all pipe connections are tight and secure to prevent leaks.
- Allow for Expansion: Leave space for pipe expansion and contraction to prevent stress and damage.
Avoiding physical damage through careful landscaping, construction awareness, and proper installation ensures your pipes stay intact and functional.
Pipe Bursts: Emergency Preparedness
Being prepared for emergencies can save time, money, and stress when dealing with pipe bursts. Knowing how to handle leaks and having a plan in place is crucial.
Locating the Main Water Shutoff Valve
The main water shutoff valve is your first line of defense in a plumbing emergency. Here’s how to find it:
- Inside the Home: Typically located where the main water line enters your home, often in the basement or crawl space.
- Outside the Home: If not inside, it may be located near the water meter outside your home.
- Label the Valve: Clearly label the valve for quick access during an emergency.
- Test the Valve: Periodically turn the valve to ensure it’s functioning properly.
Keeping Emergency Contact Numbers Handy
Having a list of emergency contacts ensures you can get professional help quickly:
- Plumber: Keep the contact number of a reliable plumber for immediate assistance.
- Water Company: Have the number of your local water company in case of major issues.
- Insurance Provider: Your insurance company’s contact information is essential for filing claims.
DIY Temporary Fixes for Minor Leaks
While waiting for professional help, you can perform temporary fixes to minimize damage:
Using Rubber and Clamps
- Materials Needed: Rubber patch, clamps, and a screwdriver.
- Steps:
- Identify the Leak: Locate the source of the leak.
- Cut the Rubber: Cut a piece of rubber to cover the leak.
- Place the Rubber: Wrap the rubber around the leaking section of the pipe.
- Secure with Clamps: Use clamps to secure the rubber patch in place.
- Tighten Clamps: Ensure the clamps are tight enough to stop the leak but not so tight as to damage the pipe.
Cleaning Up After a Leak
Proper cleanup after a leak is vital to prevent further damage and health issues.
Tools for Water Removal
- Wet/Dry Vacuum: Efficient for removing standing water.
- Mops and Towels: Use to soak up smaller puddles.
- Dehumidifier: Helps dry out the area and prevent mold growth.
Preventing Mold and Mildew
- Dry the Area: Thoroughly dry the affected area to prevent mold and mildew.
- Disinfect: Use a disinfectant to clean surfaces that were in contact with the water.
- Ventilate: Keep the area well-ventilated to aid in drying and reduce humidity.
Being prepared for emergencies and knowing how to handle minor leaks can minimize damage and keep your home safe.
Professional Plumbing Services
Professional plumbing services are essential for maintaining a reliable and efficient plumbing system. Knowing when to call a plumber and how to choose the right one can save you from costly repairs and prolonged issues.
When to Call a Plumber
Understanding when to seek professional help is crucial. Here are situations where you should call a plumber:
- Persistent Leaks: If you have recurring leaks that DIY fixes can’t resolve.
- Low Water Pressure: Continuous low water pressure might indicate serious problems.
- Water Discoloration: Rusty or discolored water can signal pipe corrosion or contamination.
- Unusual Noises: Persistent banging or gurgling noises in pipes.
- Major Installations: For installing water heaters, new pipes, or major fixtures.
Choosing the Right Professional
Selecting a qualified plumber ensures quality work and peace of mind. Here’s what to consider:
- Licensing and Certification: Ensure the plumber is licensed and certified to work in your area.
- Experience: Look for plumbers with extensive experience and positive reviews.
- Insurance: Verify that the plumber has proper insurance to cover any potential damages.
- References: Ask for references or check online reviews to gauge reliability.
- Estimates: Get written estimates for the work to avoid surprises.
Routine Maintenance
Regular maintenance by professionals keeps your plumbing system in top condition.
Seasonal Maintenance Checklist
Create a seasonal maintenance checklist to keep track of tasks:
- Spring:
- Check for leaks in outdoor faucets.
- Inspect pipes for winter damage.
- Test the sump pump.
- Summer:
- Inspect and insulate pipes.
- Check for slow drains and clean them.
- Inspect the water heater and pressure regulator.
- Fall:
- Drain and remove outdoor hoses.
- Insulate exterior pipes.
- Check for leaks and drips.
- Winter:
- Keep faucets dripping during freezes.
- Monitor indoor pipes for signs of freezing.
- Ensure proper heating in vulnerable areas.
Keeping Records of Inspections and Repairs
Maintain a log of all inspections and repairs for future reference. This helps track the health of your plumbing system and can be useful for insurance claims.
- Document Details: Record the date, nature of the work, and the plumber’s name.
- Keep Receipts: Store all receipts and warranties.
- Note Issues: Make notes of any recurring problems.
Regular professional maintenance and proper record-keeping ensure your plumbing system remains efficient and less prone to emergencies.

Photo from iStock – Credit: Олег Копьёв
FAQ about Pipe Bursts
-
What causes pipe bursts in the summer?
Pipe bursts in summer are often caused by high water pressure, corrosion, aging pipes, and physical damage. The extreme heat can cause pipes to expand and contract, leading to cracks and leaks.
-
How can I prevent high water pressure from damaging my pipes?
Installing a pressure regulator helps maintain safe water pressure levels. Regularly check your water pressure with a pressure gauge and adjust the regulator as needed to keep it between 40-60 psi.
-
What materials are best for insulating pipes?
Common insulation materials include foam pipe insulation, fiberglass wrap, rubber insulation, and pipe wrap tape. Each material has its benefits, so choose based on your specific needs and pipe locations.
-
What should I do if I notice a leak in my pipes?
First, locate and shut off the main water valve to prevent further damage. Then, apply a temporary fix, such as wrapping the leak with rubber and securing it with clamps. Contact a professional plumber for a permanent repair.
-
Why is my water bill suddenly higher than usual?
A sudden increase in your water bill could indicate a hidden leak in your plumbing system. Check for damp spots, listen for unusual noises, and inspect your pipes for any visible leaks. If you can’t find the source, call a plumber for a thorough inspection.